
We will go over the 7 basic steps of re-gripping using tape and solvent, as well as discuss some common mistakes (alerts!) that many first-timers make here.
When selecting a grip, you'll want to make sure the core size of the grips is equal (or very close) to the shafts outer diameter (fyi - also the first topic mentioned in our "golf grips: 6 important things you need to know" article).
Installing new golf grips will require the following supplies/tools:
- double-sided tape
- grip solvent (or mineral spirits)
- hook blade
- shaft clamp
- vice (can be found at most hardware stores)
// STEP 1 - REMOVE THE OLD GRIP

Removing the old grip may require the use of a hook blade or knife. Remember to always cut AWAY from you, to avoid injury. Once you've sliced through the grip, you should be able to pull the old grip off fairly easily.
Working with golf clubs, it helps tremendously to use a vice and shaft clamp to head the club steady. While this is not necessary, a vice can help keep your workspace organized and clean. And since the club is held securely by the clamp, this can help prevent injury as well. Vices are sold at most local hardware stores.
// STEP 2 - REMOVE THE OLD TAPE

After the old grip is fully removed, you'll want to begin the fun (tedious) step of removing old tape. One player understandably asked if you can just put the new tape on top of the old tape (like you do with your DMV registration stickers). While this may seem like a reasonable idea (saving some time) we still recommend taking off ALL of the old tape.
Common mistake alert: Leaving old tape on may lead to the new tape may not properly stick to the old tape. It can cause unwanted bulges in your grip. Most importantly, you'll end up with extra layers of tape, increasing the diameter of the grip which may not be what you want.
// STEP 3 - MEASURE OUT THE NEW TAPE
After the grip and tape are fully removed from the shaft, we can now prep the new tape. If you are working with a roll of tape, pull out and cut the length of tape you will need. In most cases, you can have the length of tape be equal to the length of the grip. If you are using pre-cut tape strips, then you are ready to move onto step 3.
Fyi - if the tape strip is up to 1" shorter than the grip itself, that is OK. There will still be enough surface area of tape to bind the grip to the shaft.
// STEP 4 - APPLY THE NEW TAPE ONTO THE SHAFT (BUT REMEMBER TO REMOVE THE WAX PAPER ON BOTH SIDES!)

We are now in full re-gripping mode!
With the new tape prepped, and the wax backing removed you'll want to place the tape lengthwise along the shaft, but leaving about 1/4" to 1/2" sticking off of the butt end of the shaft
But wait!!! Both sides of the tape are meant to be sticky. So you'll need to remove the wax paper backing from the tape. If you're working with pre-cut tape strips, there is wax paper on BOTH sides, so remember to remove them both!!
Common mistake alert: This seems like an obvious step. But it's worth noting because out of 100 re-grips, there will ALWAYS be 1 or 2 cases where someone forgets to take off the wax backing of the double sided tape. Tragic really, because once installed, the grips are unusable.
IMPORTANT: If you realized too late that you forgot to take off the wax backing, please do NOT attempt to play golf with them or even swing your clubs. The grip could slide off the shaft resulting in serious injury or harm.
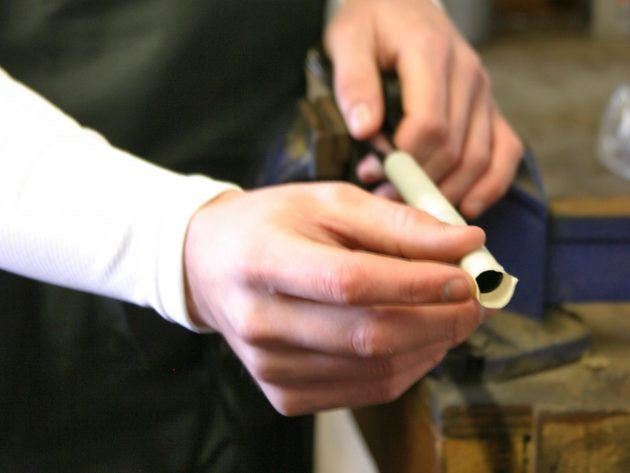
Wrap the tape around the shaft. Then take the extra tape hanging off the end, twist it and tuck it into the shaft butt.

Tucking in the tape provides 3 things. First, it allows for proper sealing and adhesion at the butt end of the grip. Second this prevents solvent from entering the shaft. Third (and most importantly), it prevents the grip from getting cut/damaged from the sharp edge while sliding onto the shaft (during step 7).
Common mistake alert: If you do not twist and tuck the tape into the butt end of the shaft, you could end up cutting through the grip material during installation and thus damaging the grip.
// STEP 5 - COAT THE INSIDE OF THE GRIP WITH SOLVENT

Using grip solvent or mineral spirits, liberally spray the shaft, making sure that all the tape is covered and moistened. Then pour some additional solvent into the grip itself, holding your forefinger at the cap of the grip to prevent solvent from escaping. Cover the opposite opening of the grip using your other hand and shake the solvent inside the grip to fully coat the inside surface.
Uncover the cap of the grip and allow any excess solvent to re-coat the grip tape.

Common mistake alert: Not using enough solvent makes it very difficult to push the grip onto the shaft and may result in the grip getting stuck midway.
// STEP 6 - SLIDE THE GRIP ONTO THE SHAFT
Here is where it can get tricky.

You'll want to work fast to avoid any solvent from drying out. As soon as you're done with Step 5, you'll want to open the grip mouth, slide it onto the shaft, keeping it as straight as possible while pushing until the shaft butt reaches the end of the grip.

Once you have pushed the entire grip onto the shaft, then quickly adjust the grip as needed to achieve the desired finished position (for example, if you prefer to have the grip logo up or down).
Then take the club, turn it upside and firmly tap the end of the grip on the ground to make sure it's fully seated onto the shaft. Some excess solvent may drip out.
A few things to understand about grip solvent:
First, solvent is needed as a lubricant that allows you to slide the grip onto the shaft. If there isn't enough solvent applied inside of the grip AND on the shaft, then there is a high likelihood that the grip will get stuck midway.
Second, solvent acts as a tape activator. This means that once dried, the stickiness of the tape goes into full contact mode. This ensures the grip is securely attached to the shaft.
Common mistake alerts:
During step 6, make sure to push the grip onto the shaft as straight as possible. If you are sliding the grip on at even a very slight angle, this could cause the grip to break apart. This is especially true for wrap style grips.
You'll also be rubbing off some of the solvent at the angled joint of the grip, causing it to lose lubrication. This could cause your grip to be stuck midway, and thus rendered unusable.
Lastly, many composite grips can be thin or delicate. Do not assume they will stretch. Many of the softer grips, such as the Winn Excel or Dri-Tac, do not allow much room for error. Again, if you are not sliding the grip on straight, they could easily come apart and become damaged.
// STEP 7 - WAIT 6 HRS BEFORE PLAYING
It's tempting to take your clubs out for play once the grips on are. However we strongly recommend waiting at least 6 hrs after re-gripping. The solvent needs to completely cure and you'll want to leave the clubs in a dry and cool area during this time.
This is a general re-gripping instructions video that is provided by Lamkin that we recommend watching: